Miller American re-build

Intlwaters

Help Support Intlwaters:

This site may earn a commission from merchant affiliate links, including eBay, Amazon, and others.
Its actually two 1/8 birch epoxied together. I epoxied a test piece and there is no way those two pieces are coming apart. I use that Bob Smith industries 30min epoxy. That stuff mixes really thick. Can you thin that epoxy with alcohol?
 
Im still for you restoring this boat but there is one other option. Use the hull as a blank for a fiberglass mold.
 
You need to tie the transom to the engine bay walls and sponson insides in some way. You can either use wood glue blocks or make some "L" brackets from aluminum and screw through the wood with machine screws, flat head through the transom and any type you like through the lengthwise frames. Here is one I machined, yours doesn't have to be this exotic as mine also has in integrated tail mount
 
HJ,

Not a whole lot is going to help the Mahogany luan in the stock Dumas kit. Tighten screws into something like that

( meaning the heavy aluminum 'U' channel piece you suggested), and you'll draw the alum right through the luan. Maybe some triangular wood pieces (I like basswood) to give a larger gluing surface and reduce the weight of blocks some. These hulls are notoriously tail heavy.

Kevin,

That's the ticket Kevin - now you see why we're saying Birch ply.

I have never tried to thin this product - always like it the viscosity it mixed to. You might try heating it a bit - that will make it flow a little better. Have a look at the West Systems site. They suggest that we not heat or thin their product, but it has been done by many I'm quite sure CHEERS !!! Bob
 
Last edited by a moderator:
I wasn't suggesting using screws through just the mahogany. That would be added weight for no gain. If it was backed or sandwiched with birch ply, that would be an entirely different story. My point was that butt joints are not going to be strong enough to handle high speed running for very long. The transom needs to be tied to the framing in some mechanical way or it's going to fail. That was issue I was pointing out, with examples of how it could be remedied
 
Last edited by a moderator:
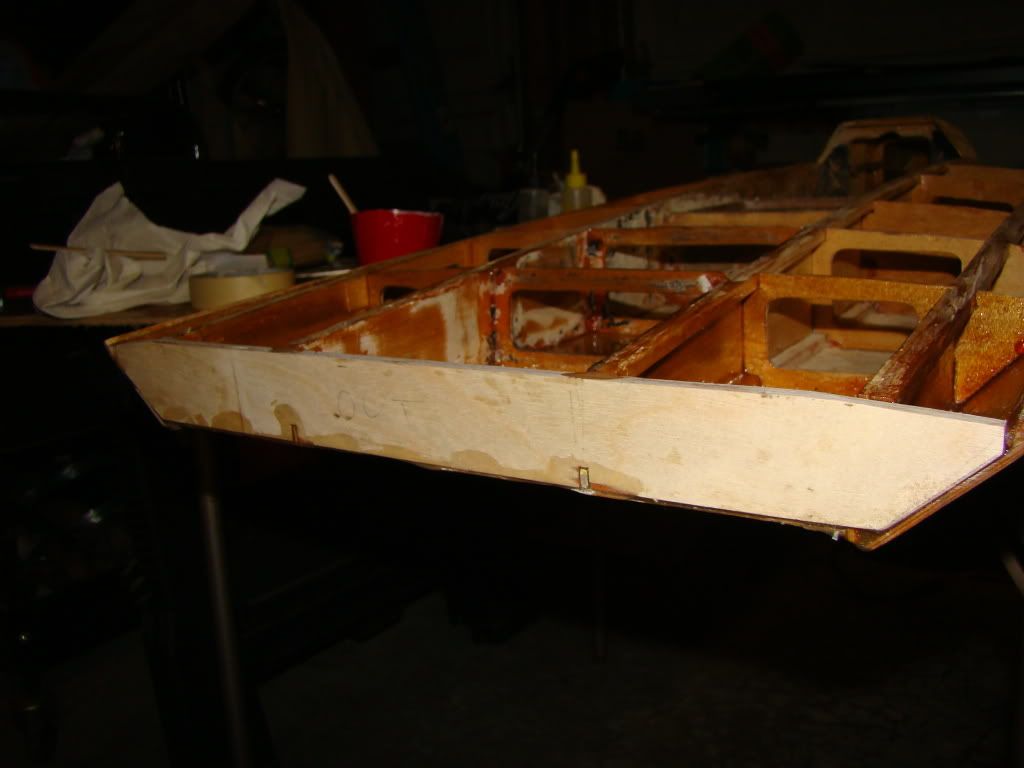
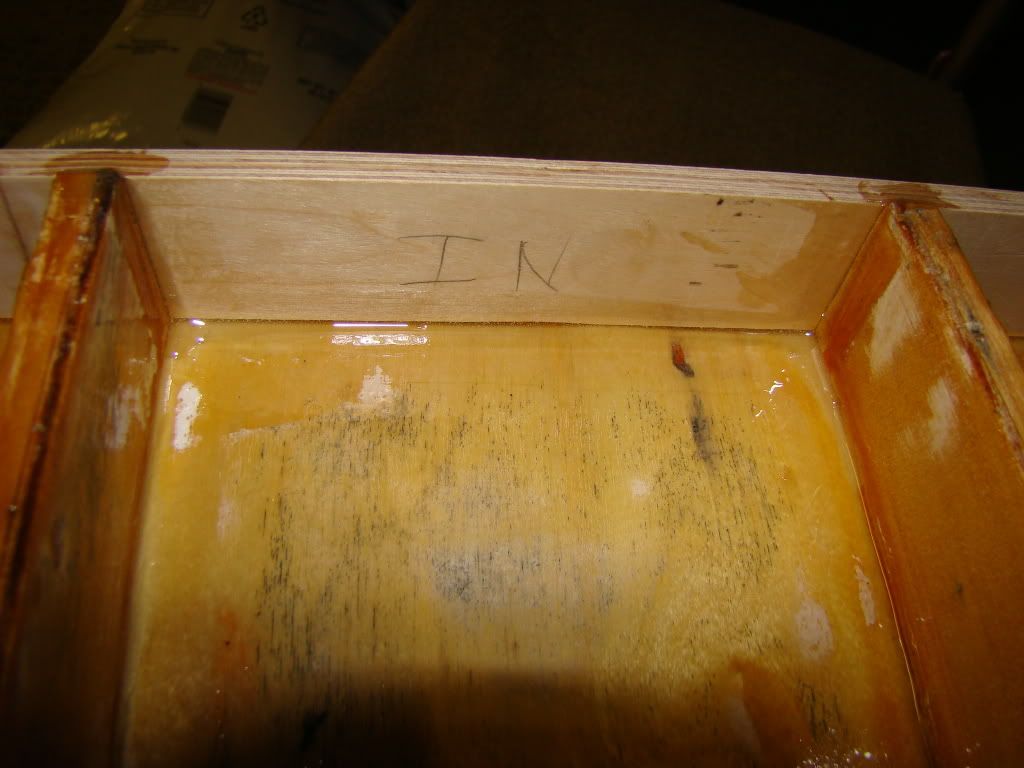
I have successfully thinned epoxy with alcohol. I would never do it where you are trying to adhere things together. I only do this when I'm coating with it. First I take an acid brush and cut about 2/3 the length of the brush off. It will make it more bristly. Then mix the desired amount of epoxy in a mixing cup. Mix it very well before adding any alcohol. When you add alcohol, it takes very little to thin the epoxy. If you mixed up a table spoon worth of epoxy, try adding 1 or 2 drops of alcohol. Mix this into the epoxy. It will turn the epoxy white. Don't worry, it will cure clear. When mixing, you're shooting for the consistency of paint. You will have to mix it a lot. At first it seems as if it wont mix well, but keep mixing. When it looks about right, I paint it where I need it with the acid brush. Use acid brushes. They are 16 cents each at Lowes, or Home Depot. This way you don't need to worry about cleaning them with acetone. You can just pitch them. Use rubbing alcohol. That is what I use. I have never tried using denatured alcohol, so I can't tell you how it will work. I find by mixing the alcohol with the epoxy, it tends to absorb into the wood better. I do the inside of the tubs of all the Hydros I make using this method. It may take a couple of coats to get a consistent glass like finish because the wood soaks it up a lot on the first coat.

Marty
 
You need to tie the transom to the engine bay walls and sponson insides in some way. You can either use wood glue blocks or make some "L" brackets from aluminum and screw through the wood with machine screws, flat head through the transom and any type you like through the lengthwise frames. Here is one I machined, yours doesn't have to be this exotic as mine also has in integrated tail mount
Great suggestion my dumas circus i just made a transome plate(aluminum) and my dumas kit did not use luan for the transom plate it worked fine and my electric scale(heavier) loaded was barely 14 pounds. Weight can be an issue but strength is more important. Aluminum is light so I think HJ's suggestion is a sound one.
 
Last edited:
Its been sort of slow going. We have been getting ready for our vacation and what not. I did get the transom epoxied in. I will try to get some pictures up. What Im working on now is sealing all the bulkheads with resin epoxy so I have a fresh clean slate to start mocking up the boat. I want to be 100% sure how everything is going to be placed before I re-skin the hull. Its just really slow going right now.
 
DSC04173.jpg


DSC04172.jpg
 
Hey Kevin,

Lookin' Good!!! All your hard work will pay off in the future with this hull. I was amazed you were able to get the deck of the hull off so easily and cleanly. I'm thinking the hull was not originally assembled with slow cure epoxy glue - maybe one of the quick sets?? Your rudder assembly will appreciate the Birch ply transom.

Have a Great vacation. It will be there when you return !!! Cheers, Bob
 
Kevin,

I've seen several boats with the inside painted white. I don't know if this is common practice with big scale boats, though. Maybe doing it with this boat, would do something to improve the aesthetic value. It would save you a lot of time trying to sand the wood clean. If you decide try, I highly recommend this product

http://www.por15.com/WHITECOTE/productinfo/WCG/ I have used this product a few times. It is bullet proof , hard as a rock, and extremely white. makes for easy clean up after running, too. It mixes 4 parts to 1, and you can apply it with a brush or spray it on. If you spray it, you need to reduce it with xylene. You could do just the compartments that are going to be visible after you put the skin on.
 
I know bondo(body filler) absorbs water but what if you were to seal it like thw wood? Take some expoxy resin thinned out and brush over it. Would it be safe to assume it would seal it and make it more rigid?
 
Looking good I think this boat will come out nice.What did u decide for a drive train?
 
"I know bondo(body filler) absorbs water but what if you were to seal it like the wood?"

Hey Kevin,

I have an alternate suggestion for you. Microballoons mixed with slow set epoxy makes a great filler too. Bondo and a lot of those products use polyester resin. Epoxy glue will stick to roughened polyester resin, but polyester doesn't stick to epoxy well at all. I used to use epoxy slow cure to assemble pieces on and in a Polyester hull, but I try not to mix the two and stay will all epoxy materials these days. Normally microballoons is mixed about 3:1 - if you want it lighter = add more microballoons - - heavier + less. I used to really like the old Prather phenolic Microballoons (brown in color)- but that went away. I'm using a Prather product that is white now, and recently picked up Top Flite Lightweight Microballoons filler at the LHS. Just trying to offer up suggestions. CHEERS !!! Bob
 
Last edited by a moderator:
I know i should go 1/4 drive but i have 3/8 everything. Still not 100% on that though.

Dasboat, thanks for the info on the microballoons. Im going to give it a try.
 
Hey Kevin,

You are more than welcome Kevin. Just trying to provide you alternatives that have worked for me over the years. And "Yes" I did learn the hard way about polyester not sticking to epoxy - - What a bloody mess to get off.

I'm thinking you mean 3/16th" (.187") diameter shafts, collets, drive dogs, and other drive line components. I ran 3/16" drivelines running OPS 67s for years without incident. Since that is what you have - Run what you have on hand. If you decide later in the game that you need 1/4" drive line you could replace it at a later date.

I always install drive lines with a piece of brass tubing - one size larger than the OD of shaft tubing - that gets epoxied into the hull. If you need to replace a shaft guide piece of tubing, you can simply slide the full length tubing out and replace that.

I have attached some pics FYI. In these pics, I have a piece of 1/4" drill rod tightened in the shaft collet mounted on the engine which extends through the bottom of the hull opening. I slide a piece of 1/4" ID tubing over the drill rod, then the next size larger (5/16" ID I believe) over that. This piece becomes the shaft guide tube. Note the shorter piece of brass tubing going through the hull. This is the piece that gets epoxyied into the hull. Same procedure for 3/16" shaft - just use different diameters of brass tubing. CHEERS !!! Bob
 
Back
Top