JAE Gas Outrigger Build Thread

Intlwaters

Help Support Intlwaters:

This site may earn a commission from merchant affiliate links, including eBay, Amazon, and others.

f41stryker

Well-Known Member
Joined
Jun 6, 2006
Messages
510
Alright well I mixed up some glue this weekend and dived into building the boat. My goal of this thread is to chronicle the way I'm building the kit but to also provide feedback and perhaps suggestions to the designers that they may incorporate into the manual to perhaps answer questions other beginners may have. I really have no formal experience in the building and rigging of rc boats, the vast majority of the rc boats I have owned in the past are second hand. So building a kit is very new for me and should be a hopefully great learning experience. This thread is not meant as a criticism to the boat designers or writers of the directions, merely its the perspective of new builder.

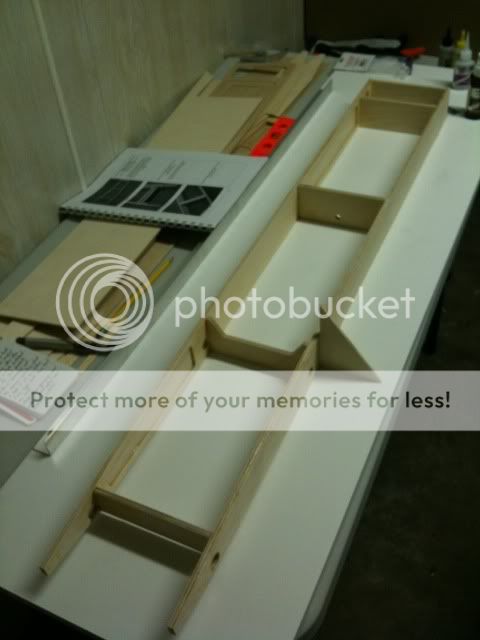
Building the Tub sides

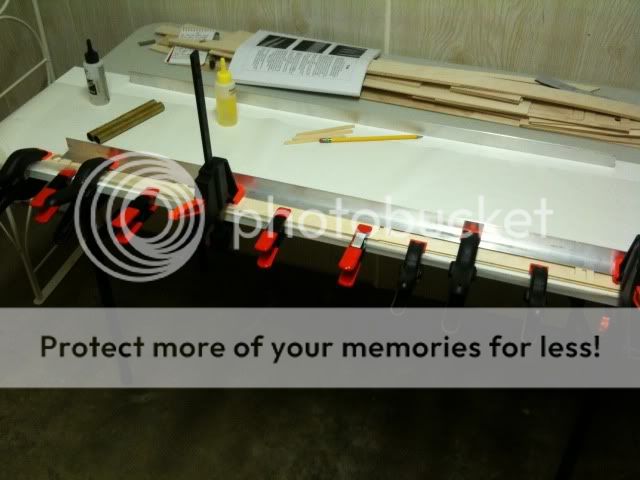
After unpacking and evaluating the contents of my kit, I let the wood sit out for a few days in the basement of my house where the construction will take place. The only thing that was unusual were the tub sides being fairly curved, I weighed them down with about 50lbs. or so of weight for two days and still they come up curved so extra clamps were brought in for the lamination process. Here is one area I thought the directions could have been perhaps a bit more clear for the true newbie, there is no distinction for what type of glue to use or what side to apply it to. So mix up some 30 minute epoxy and get to spreading. I used a wooden stirring stick to spread a thin layer on the inner slotted tub side as I could scrape off excess with the flat edge of the stick. The epoxy starts to setup kinda quickly, so don't think you have a full 30 minutes of time before it starts to set.

c5e45d77.jpg


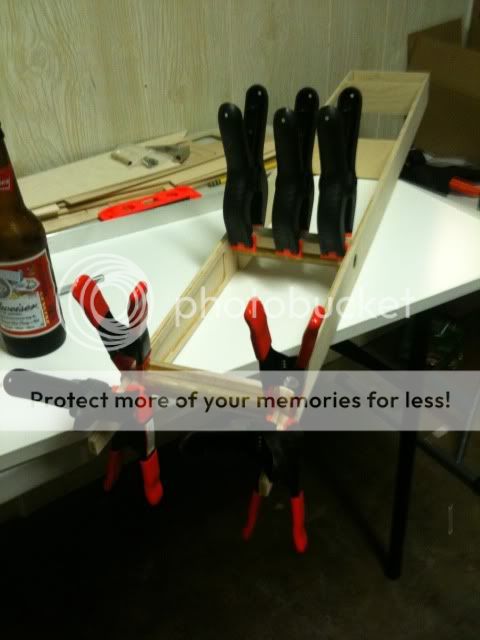
You can see here the side is fairly curved when compared to the angle.

31e6aecd.jpg


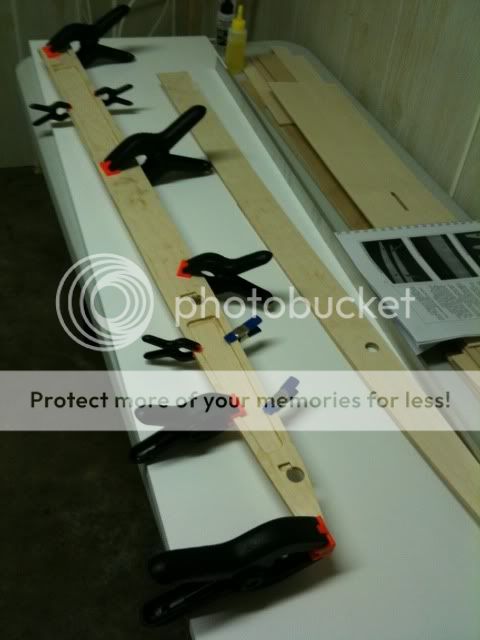
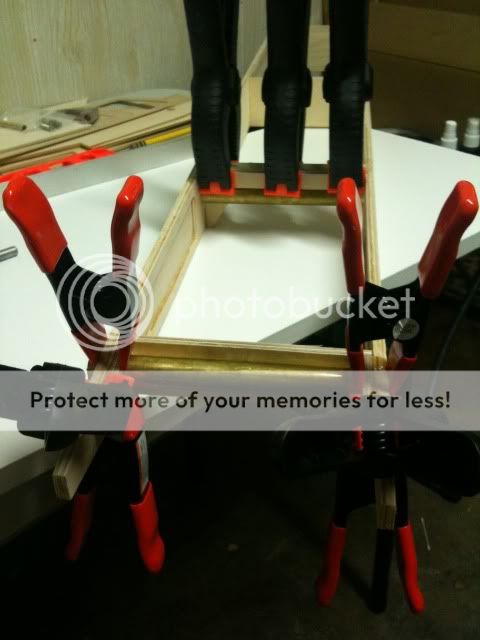
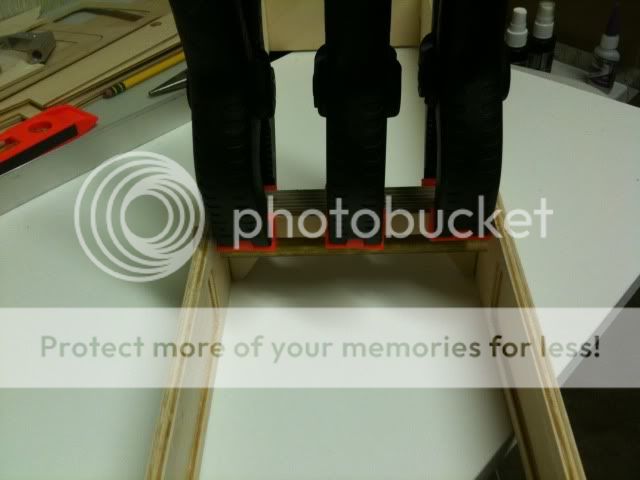
Here shows the other side, I decided to clamp the entire inner/outer side rather than just using weights as the curve in the outerside was severe enough, I worried that without something sitting over the entire tub side itself, some areas may not fully laminate to one another. I used the brass boom tubes as an alignment tube per the directions but removed them after clamping as I didn't want them to "accidentally" become epoxied in here. I'm going to let the parts dry overnight and will resume the build tomorrow evening after work hopefully...
 
Well checked on one of the sides and and it came out bad, moved slightly and parts of it didn't laminate well. Guess I'll be ordering another one, perhaps some bar clamps and wax paper on the next set of sides. An unfortunate setback, guess I'll have to be quicker with the epoxy.
 
Well checked on one of the sides and and it came out bad, moved slightly and parts of it didn't laminate well. Guess I'll be ordering another one, perhaps some bar clamps and wax paper on the next set of sides. An unfortunate setback, guess I'll have to be quicker with the epoxy.
For strength use slow epoxy,id weight them as it will ensure it laying flat assuming your using a shelf board. We tacked the bulkheads with thin ca then went back with slow cure West epoxy. Im sure if you ask Joe At Zipp he can help you out with new side and doublers
 
Weighing doesn't seem to help, the sides were really curved straight from the box. I'm gonna try bar clamping to the jig and hopefully that'll help this time.
 
Whoa, must have really have been warped if even weights didn't help.

To keep the 2 laminates aligned, you might want to apply the glue, align the 2 pieces- then stick a pin through both somewhere forward and another one aft- to ensure the 2 pieces remain aligned. You can clip the pin off, and leave it there if you choose, or leave enough sticking out that you can remove it once everything has become tacky enough not to move any more.

30 minute epoxy is good stuff for what you're doing, I'm sure West System would be also. For jobs like that- to spread glue over a large area quickly, I use scraps of wood- like 1/16" plywood, maybe 1/2" or 1" wide (sized to the job) with the end squared off, like a spatula. Helps spread the glues quickly over large areas.

Good luck!

Wes
 
Last edited by a moderator:
Has anyone thought about what rudder servo to use? I am thinking 645MG. Great idea using the 1" angle.
 
Weighing doesn't seem to help, the sides were really curved straight from the box. I'm gonna try bar clamping to the jig and hopefully that'll help this time.
If you go this route (jig and clamps) you should get a piece of wood the same length and width to put pressure evenly across the wood when glueing or buy more clamps.

And don't worry about a little curve in the sides of the tub. When you glue the bulkheads and sheeting they will turn out straight.
 
Last edited by a moderator:
I just laminated mine today, mine were bowed about 2 inches on each end. I was concerened that they would not line up correctly being that they were so curved and would move when weighted. I bit the bullet did the best I could to line them up, placed my mdf board as my base, laid out the pieces, set another board on top and put 10 20x20 tile slates for weight on top. I guess we will know if that help.
 
there is still a slight bow to them but less than 1/4 inch. It should be fine in the jig putting the bulkheads on
 
there is still a slight bow to them but less than 1/4 inch. It should be fine in the jig putting the bulkheads on
It will be fine just use the jig when adding parts to the tub so it will stay straight. A 645 will work fine or a quarter scale will also. My experience says use a standard servo for throttle,it seems most minis dont take vibration from Zenoahs very well
 
a HS225MG will hold up well to vibration, & save a little weight & space. they have survived everywhere i have had mini's fail. good price, too.
 
Alright, I got my NEW tub sides from Joe @ Zipp yesterday-MUCH more flat, again a big thanks to the folks at Zippkits for helping out a beginner. So today I stopped in at Harbor Freight, slowly but surely completing my collection of every clamp they sell to pick up some bar clamps and other miscallaneous supplies. So here is attempt #2 on building Tub Sides:

da4fad8c.jpg


814d13aa.jpg


Ok-so a couple key differences here. Namely, I used wax paper on the jig and clamped flat, I took my unattached piece of angle and clamped it across most of the tub side to get a fairly even clamping force. Everything seems lined up well and I've got about double the amount of clamps on it this time. I'll let it setup for about 5 hours and go in and do the other side, which will put me on pace with where I was one week ago! Next, bulkhead fitting!
 
Caution on the HS225MG. I've had 2 new ones fail in a gas whiplash within a day, and 1 new one fail on the bench in a .12 rigger. I think there is a bad batch floating around, because I've also had some that are just fine.
 
Well I finally got the tub together, was careful to make sure all bulkheads were square. One area to beware of is bulkhead 1 in the front where your 1/4" ply tube doublets will go beware of glue placement here to maintain a good fit. If you're like me the glue fillet makes it so they won't sit flat. So be sparingly when gluing here. Here are some pix.

a91a19a1.jpg


then as I'm fitting the brass tubes disaster, bulkhead 1 breaks away. I guess too much stress, I squared and reglued, should I be concerned?

8b253526.jpg
 
Well rather than remove the brass tube I scraped with a xacto knife most of the ca out of the bulkhead joint and got the boom tube doublers pretty flush against the tub side. 30 minute epoxy there, some clamps and let it dry. I went ahead and installed the aft supports as well. The instructions were a little unclear here, basically I just lined up the two 1/4 ply and one 1/8 play, and expoxied them together against bulkhead 2. Hope this is right....

1db53468.jpg


940c2dae.jpg


becb00bd.jpg


I went ahead and applied epoxy to the area that broke yesterday. I also added epoxy to the area on bulkhead 1 where I scraped away ca to allow the 1/4" doubler to sit flush.
 
Looks Great !!

I might try making sure the tub doesnt twist while clamping your doublers in for drying. I am always making sure everything i got drying is weighted and not twisted on a granite table. The brass tubes i would guess have to be perfect, any little twist with them will be huge out at the sponson.

Paul
 
Back
Top