Sorry for the long delay, between school and home maintenance, haven't had much time for working on the boats.
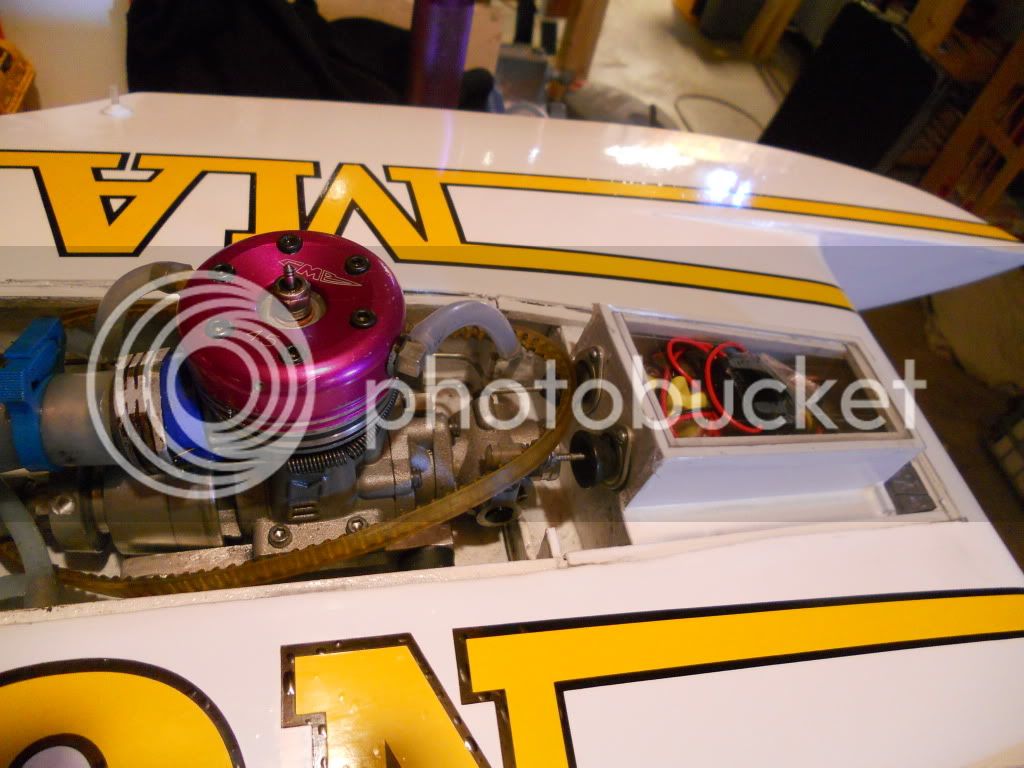
I've designed a set of engine mount mounting rails and started working on the first one. With my little Sherline mill, it tends to take time for any major part work so...............................................
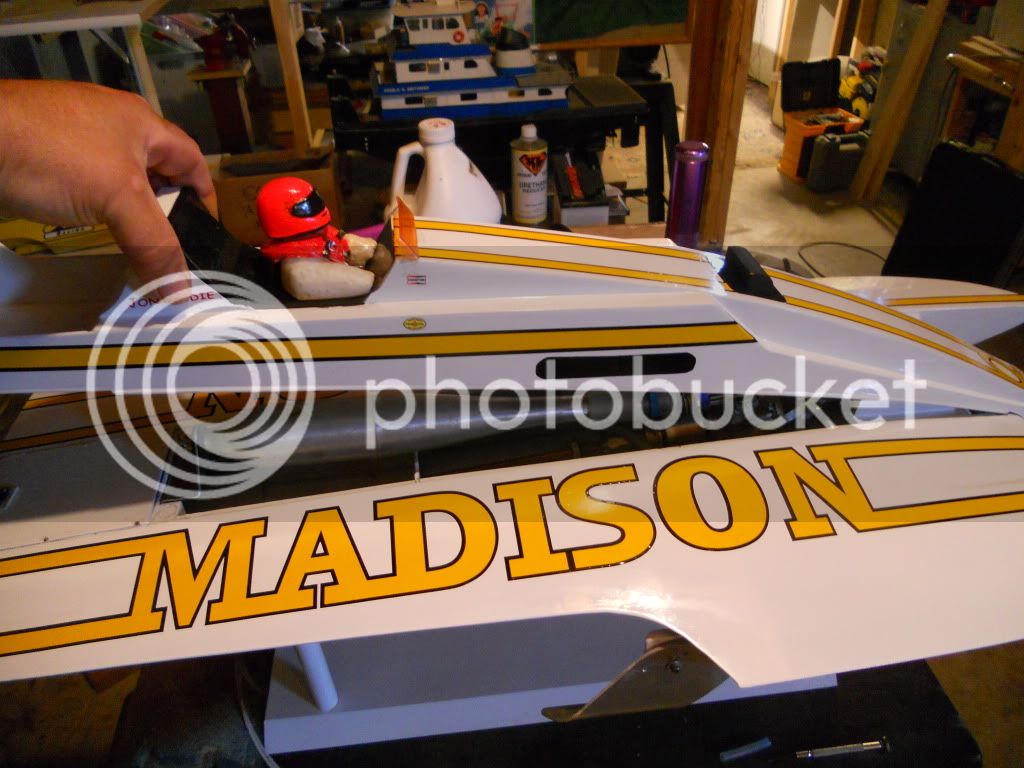
One thing I have managed to get finished is shaving down the heads of the engine mount retaining screws that hold the rubber isolators to the bottom of the boat. When I originally set everything up, the heads stuck up from 1/16 to 1/8". Since I don't want the screws visible after the boat is painted, I broke out the Sherline Minilathe(first time this has happened and I've had the lathe for several years) and clamped an appropriately sized nut in the chuck. I ran the screws down into the nut and VERY SLOWLY cut down the height of the head. If there are any machinists that know of a better way to do this, PLEASE LET ME KNOW AS THE RESULTS WEREN'T AS GOOD AS I WAS HOPING FOR!!!!!!!!!!!!!!!
The next step will be securing the screws in the recessed holes with epoxy and resealing both inside and out of the bottom so I will be able to install the mounting rails and engine when the rails are completed. More to come
")