Gaday allMate Here is the setup sheet that phil Emailed me
I did as per this and mine run's GREAT

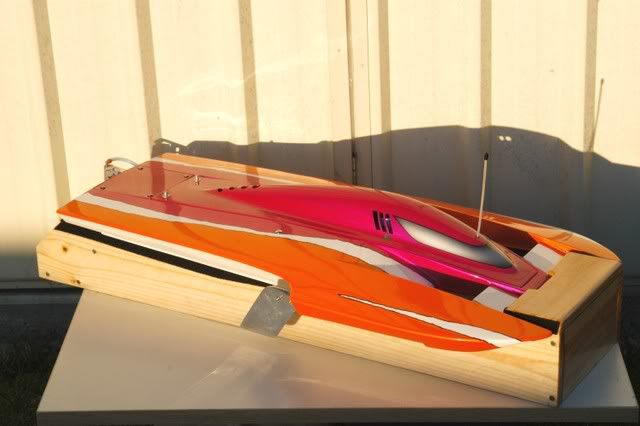
SUPERSPORT45 SETUP 1-08
1. MOTOR MOUNT
Install the motor mount using 3/4x 8-32 screws. Use a 5 inch wide Speedmaster universal
mount or Octura Humdinger mount. The Speedmaster ½”drop down mount can be used,
but the inside floor of the engine well needs to be cut out for clearance of the engine flywheel .
2. STRUT/DRIVE SHAFT
Mount the strut on the boat thru the bottom of the hull set the depth of the strut to 7/8” deep.
Set the strut flat on the table or only about 1/16 higher at the front of the strut. Measure from the bottom to the table. Cut out the slot for the strut and the drive shaft tube. Cut the shaft slot 7 to 12 inches from the transom. The tube runs straight out of the hull with a bend near the strut.
Use a 9/32 tube for the shaft tube to be glued into the hull. The ¼” shaft tube will slide thru this tube and thru the strut. With the motor mounted on the mount and the strut set at the 7/8” inch depth, enlarge the drive shaft slot until the tube lines up with the engine nut. Insert your cable drive shaft thru the strut and brass tube and into the engine nut. Tack the brass tube into the hull with CA glue. Glue a ¼ inch wood wedge under the front of the tube to support it. Tape up the slot on the bottom of the hull and use epoxy and glass cloth the glue the drive shaft tube into the hull.
3. RUDDER
Mount the rudder on the left side 2 ¼ “ from the center. From the bottom of the boat the
depth of the rudder is 4“ deep. The rudder pivot should be about 1 ¾”from the transom.
Use a stiff control rod to the radio box a fiberglass aero shaft works best.
Use a high power standard size servo for the rudder. Do not use too much rudder throw,
about 5 degrees will turn the boat.
4. TURN FIN
Install the turn fin on the inside of the mount. Mount the turn fin at 90 degrees, on the line marked on the hull. Set the bottom of the turn fin 2 inches deep. Sharpen the outside edge of the turn fin. Use6-32 or 8-32 screws for the mount. Drill and tap the aluminum plate in the rear of the sponson.
Check the alignment of the fin, it should be straight. Use a straight edge or ruler held against the fin. Twist the fin until it is parallel with the sponson running pad. A misaligned fin will cause the boat to pull left or right or spin out when turning left. See diagrams for bottom view.
5. FUEL TANK
Mount the fuel tank with wood blocks with hooks and rubber bands to hold it in place. Use a 14 oz DUBRO tank or a SULLIVAN 14oz SS tank for the rear radio boat setup. The front radio boat set up should have the tank mounted in the right deck next to the motor. The Sullivan 12oz RST tank will fit. You should use a hopper tank to feed fuel to the carb. A Hayes 2oz or a
Sullivan 2 oz tank will work for a hopper tank. Tanks 2 U makes a 14oz. metal front tank.
6. RADIO BOX
The rear radio box should be mounted as close to the motor as possible. Allow clearance for the engine cable nut . The front box sits in front of the engine, the control rod for the carb is short,
a Bruline #100 boot should be used here to allow movement of the control rod.
Use a stiff control rod for the rudder link, A carbon fiber push rod is best.
Use a Sig #SH654 or Dave Brown Products control rod. Mount the radio box with wood blocks with hooks and rubber bands to hold it in place.
7. COWLING
Cut out the air scoop or slots in the cowl to ventilate it. Before painting, set the cowl on the hull and mark the cowl where the latch sockets show thru the glass, drill a 5/16 hole in the cowl deck for the push buttons. Mount the cowl using Aeromarine push button latches. If you have the Turbine cowl install the latch mounts six inches from the rear of the engine well. The rear 7 inches of the Stealth cowl deck can be cut off and mounted to the hull with screws or clear tape.
8. FINISHING THE HULL
Finish the edge of the hull seam, drill all holes for hardware installation before primer and paint.
Drill some 3/16” drain holes in the transom to allow water to drain from the hull
9. INSTALL THE FRONT CANARD WING
Use epoxy to glue the wings into the hull. Mount the front wing flat side up. Cut out the nose on the red marks and insert the inside wing end. Level and square up the wing, mark the sponsons
and cut out the slots.
10. TRIMMING THE BOAT
The hull should balance about 18-19 inches from the transom without fuel. The 7/8” inch strut depth is a good starting point. If the boat rides too light on the water, adjust the strut
deeper. If the front sponson are running too hard on the water adjust the strut higher until the boat rides flat on the water but will not blow off. Small adjustments to the strut angle can be made also. The strut can be set up flat on the table and at a depth of about 1 1/8” deep from the hull bottom to the table. Weight can be added to the nose or sponson tips to fine trim the hulls balance point if needed. Insert lead strips in the end of the pipe insulation, tyrap the flotation tube end to hold the weights at the tip of the front sponsons. More weight in the left sponson tip helps trim the boat balance point, add 2-4 oz. Once the boat is set up correctly no changes should be necessary for smooth or rough water other than adding weight to the nose. On a calm day the boat may spray water from the forward steps of the front sponson, raise the strut to lighten the boats ride, but be careful not to make it too loose when racing on rougher water. In rough water the boat may look like it is too loose on the water, do not change the trim unless the boat tends to blow off.
11. ADD SOME FLOTATION TO THE HULL AND COWL
Use foam pipe insulation tubes or strips of pool floats in the hull and cowl. Use 6-8 foot of 2 inch pipe insulation. Do not use spray foam it will soak up oil and water and add weight to your boat..
Thank you for purchasing the Super Sport 45. You may contact me by phone 217-429-6444
PHIL THOMAS 1175 W MARIETTA DECATUR, ILL 62522 Email
[email protected]
FINISHING EPOXY GLASS PARTS
Epoxy glass parts will get tiny pin holes or small air bubbles due to the air trapped in the epoxy surface coat. We try to keep this to a minimum but you may find some on your parts.
The best way to finish the epoxy parts is to start by dulling the surface of the hull and cowl with a green finishing pad, do not sand into the glass cloth, this will cause more pin holes. Inspect the part for pin holes, use a sharp pointed knife to open any pinholes you can find.
Spackling paste used for wall board is good for filling pinholes.
Apply light weight spackling with a spreader. Fill all pin holes with the spackling remove any excess and let this dry for 2-4 hours. Lightly dry sand the parts with a red finishing pad. Check for additional pin holes and apply a second coat of spackling to any larger air bubbles. Sand the final coat of spackling and apply your first coat of primer.
Use epoxy primer and paint the part with epoxy or polyurethane paints.
Apply at least 3 light coats of clear to ensure your paint job will be fuel proof.
HARDWARE LIST
SuperSport 45
Rudder Speedmaster 21 hydro wedge rudder with water pickup (not mini 21 hydro)
Motor Mount five inch Speedmaster, or Octura, rubber mount
Strut Speedmaster sport hydro strut extended shaft strut
Shaft Assembly Speed MasterSPD 125- 24”x.187 cable or HUEGHY B6666-24 3/16x24”,
SpeedMaster SPD 113-.187 shaft bushing, Octura drive dog oc6d
K&S ¼ x36” brass tube, K&S 9/32x12” brass tube
Prop Octura x450, x646/3, x450/3, x452,1455cupped,
Turn Fin & MH HARDWARE 4602 S.W.316TH Place Federal Way, WA.98023
mount 253-838-2568
Email
[email protected] Mike Hughes Motor Mount, turn fins, other hardware
Fuel Tank (Rear Radio) 14oz Dubro, or 14oz. Great Planes tank
Tanks 2U makes a nice metal tank
(Front Radio) Sullivan rst12oz.
Hopper tank, 1 ½ oz Sullivan or Hayes 2oz
Misc. Parts AquaCraft Push Button Cowl Locks (2) LXMNM0 (Tower Hobbies) or
AquaCraft Grimracer Cowl Locks (2) LXMHB4 (Tower Hobbies)
Or two push button cowl locks, Speedmaster, Aeromarine or dumas
carbon fibre push rod, Sig #sh654 or Dave Brown Products
three feet large tubing for water lines
one foot medium tubing for fuel lines
three push rod seals, G&M silicone seals with push rod ends
or #100 Bruline seals
Water proof antenna, Bruline #110
Tuned pipe mount, Prather Boats
Glue Long set epoxy, gap filling CA glue with quick set spray
Paint Klass Kote epoxy paint or auto paint and clear coat
SUPPLIERS ALS’ HOBBY SHOP 121ADDISON ELMHURST ILL. 60126 630-832-4908
G&M MODELS 17W323 16TH ST. OAKBROOK TERR. IL. 60181 630-279-2451
SPEEDMASTER Office & Fax : (407) 889-2283
Email
[email protected] All hardware, struts rudders motor mounts.
VIRGINIA CRAFTSMAN
DICK TYNDALL 8151 SAWYER LANE MECHANICSVILLE, VA 23111
[email protected] PH 804-730-7865
MH HARDWARE 4602 S.W.316TH Place Federal Way, WA.98023
253-838-2568 Email
[email protected] Mike Hughes
Floor Motor Mounts, turn fins, other hardware
TANKS 2 U WALT BARNEY 5929 ROSEMARY LANE CEDAR BLUFF,AL. 35959 PHONE 256-779-6472 EMAIL
[email protected]